

By Randy
@coffeeswiller
Hiya, folks! I some more miniature hobby stuff to talk about concerning one of my favorite games, Warmachine by Privateer Press. In a recent post I did on playing Warmachine on a budget, one thing that came up after a helpful comment by a reader was that using magnets to be able to quickly convert one warjack or warbeast to another was one way to save money. I had been itching to try this for months! I finally got a warjack kit, and wanted to share my first attempt at building a model this way. So here's the model:

And here it is all laid out to show the parts:

This kit allows you to build three different warjacks: the Centurion (with spear & shield), the Hammersmith (with 2 matching hammers) and the Avenger (with a sword & a seimic cannon arm). So planning ahead, we primarily need to have the ability to swap out the arms. Each warjack also has a different head, and while this isn't necessary, we'll magnetize those, too. Finally, there are two sets of shoulder pads. It is perhaps completely frivolous, but I'll magnetize those, too.
Here are my tools:

There shouldn't be anything surprising there. From left to right, we have magnets, brass rod, a file for removing mold lines, liquid green stuff, superglue, a pin vise/drill, an X-acto knife and tweezers. Not pictured is epoxy putty (I prefer ProCreate putty) and a Sharpie. Here are the magnets (3mm x 1mm neodymium):

The first step after planning is to drill holes for the magnets. Many model builders will already be doing a bit of this to add pins or brass rods to support heavier parts of models. What I am going to do here is make holes large enough to set in a magnet.

I used epoxy putty and superglue to set them in.

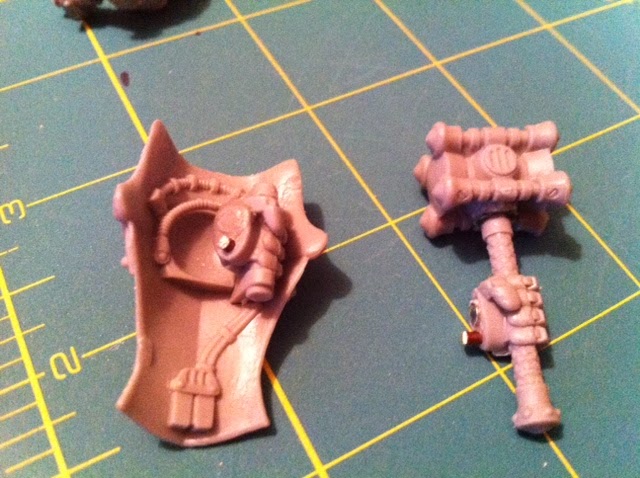
That one is the right arm. That one I pinned to the shoulder, since all the right arm does is hold a weapon in all the possible configurations. Here's one of the weapons (the sword for the Avenger). Each of the right arm weapons has the hand molded to them, and here is what an inset magnet looks like on one of them.

The left arm was a little more tricky. First of all, there are two separate arms: one is a cannon, and the other an arm like the right that has two different weapon combos (a hammer and a shield). The arm and shield combination is fairly heavy, and one magnet (at least of the size I have) will not suffice to hold the whole assembly. So here's what I did

I drilled a hole for a brass rod, and I set in one of the magnets slightly farther back. I tested positions for where to place them and this seemed the best. Here are the two arms:

And here is wrist of the left forearm:

Each has an inset magnet on the top and a brass peg below. The hammer hand didn't really need it, but I figured it wouldn't hurt. And here is the finished kit, laid out in all its separate pieces:

And here are each of the warjacks it makes:
 |
| The Avenger! |
 |
| The Centurion! |
 |
| The Hammersmith! |
This was a fun kit to build! It will, of course, be painted and set on a finished base. But right now, my painting queue is pretty large. One observation I will share that you should note for your magnetized projects is that magnets have positive and negative sides, and your pieces will need to match up. I recommend using a Sharpie to place a dot on a magnet, and be sure to test before gluing. That's it!
Do you have any model projects that you are particularly proud of? Tell us below!